June 4, 2020
Ladies, my ladies, I launched my Facebook Group Woman with Passion back in 2020 and used it as a place to host GRWM videos, to talk about highs and lows, to connect with other women, and while it’s gone a bit dormant, it might be time to bring it back! If you want to join or learn more about SeneGence, keep scrolling. Thank you for coming with me on my journey!
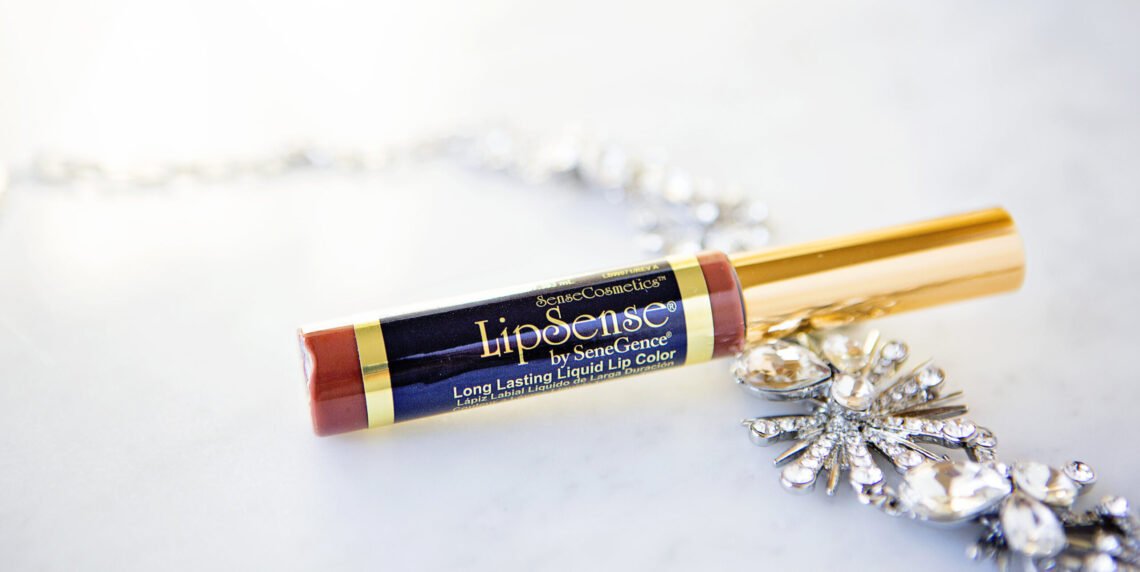
LipSense was the gateway to my SeneGence obsession. For those of you that are new to it, here are the basics on how to apply it 🙂
It shouldn’t feel overwhelming or scary for those of you that aren’t accustomed to wearing lipstick – but I will say there is a little bit of a learning curve to LipSense.
If you are already confused and don’t know what LipSense is, it’s a long-lasting, smudge-proof, kiss-proof, budge-proof lipstick that is AMAZING!!! It comes in so many colors and can be mixed to make new colors.
Alright, let’s get to the deets! Here’s how to apply LipSense 🙂

Step 1: It is absolutely best to start healthy lips! LipSense molecularly bonds onto your lips — which is why it lasts all day! How do you get healthy lips? Start with exfoliation! You can use a simple sugar scrub, brush with a dedicated tooth brush, or use LipSmooth™ Conditioning Polish.

Step 2: Make sure your lips are COMPLETELY dry. Be sure to think about the inside edge of your lips that might still be moist. You can use toilet paper or tissue to dab away any moisture.
Step 3: Shake your LipSense color!
Step 4: Start in the middle of your upper lip (cupid’s bow) and draw down to the corner of your lip.
Step 5: If needed, get more color on your applicator, fill in the center of your lips, and then draw down to the other corner.
Step 6: Next you’re going to now fill in the inside center of your upper lip – in one pass.
Tip! Using LipSense is a little like using a dry-erase marker. If you go over the same spot twice, the first layer will lift a little bit. It is a tricky one to remember, but try not to layer the passes until they’re completely dry!
Step 7: Get more color on your applicator (if needed) and draw from corner to corner on the outside of your bottom lip.
Step 8: Fill in the inside of your bottom lip.
Step 9: Let this first layer dry COMPLETELY – about 10-15 seconds.
Then repeat the process for a 2nd and 3rd layer. The new layer can ruin that first layer if it’s not completely dry, so just be patient and wait. You do need 3 layers of LipSense!
Tips!
Some people like to line the lips first with a darker color.
You can use different colors for different layers to mix colors
If your color is coming off or it’s looking splotchy, try to follow these instructions. The application process is that important!
If you normally wear chapstick and vaseline, other waxy lipsticks, you will go through an exfoliation process. It will take a couple weeks. LipSense has medical grade alcohol in it. This exfoliates the lips over time which keeps your lips healthy! Waxy products will prevent the LipSense from truly getting on your lips – which means it can’t molecularly bond to your lips the way it should. If you are having trouble, give it two weeks!
Step 10: When your three coats are dry, you’re going to seal in your color and add some moisture back into the lips with your gloss. There is zero moisture in the color and it will feel tacky until you apply gloss. Glossy Gloss is the most hydrating of all the glosses. If you’re new to the system, it’s the one that’s recommended to start with. It’s a little bit on the stickier side and I really hate sticky lip gloss. So what you can do is apply the glossy gloss, rub it in nice and good to add moisture into the lips, and then go over it with a different gloss, like the Matte. I do this frequently!
I am always happy to make recommendations based on my personal experience or get you input from my sponsor who is far more knowledgable 🙂 Please join my private Facebook Group and if you know any ladies who are passionate, fun, and interested to talk about the ups and downs of womanhood – please invite them too!
Here is the new Beauty Book which you can look through OR you can browse my SeneSite at your convenience 🙂
You’ll want to apply the LipSense gloss as needed throughout your day – but you shouldn’t need anymore color. If you do need more color, say it’s fading in the waterline or is flaking a bit (it shouldn’t after a couple weeks of dedicated use) just wipe off the gloss, make sure your lips are dry and then re-apply the color.
I’ve done a couple live videos of myself getting ready in the morning. I will continue to do Facebook lives though, so make sure you’re following along here!
Q&A:
Does LipSense have an SPF? Not chemically BUT LipSense has a mechanical shield that is equivalent to SPF 15!!
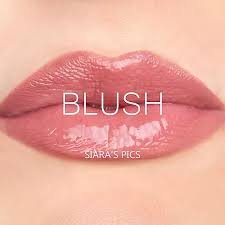
What are your favorite colors? I’ve not tried them all — but I went through a phase of buying 2-3 new colors each month and am excited to keep trying them! So far, my favorites are:
Violette, Napa, Blush and Kiss My Sass


If you are intrigued by LipSense and want more information or need help picking out colors, come over to my private Facebook group, request to join, and come party with us!!